雰囲気としては以下の「2chまとめサイトビューア - MT2 FREE」みたいなものです。
 2chまとめサイトビューア - MT2 FREE 2.7(無料)
カテゴリ: ニュース, ブック
販売元: Trysail Inc. - Trysail Inc.(サイズ: 2.5 MB)
やることは単純で、プロジェクト作成の際にタブバーを使ったアプリを作りたい場合はおそらく「Tabbed Application」を選ぶと思いますが、それを選ばず「Single View Application」か「Empty Application」を選んでコードでタブバーを生成してやるだけです。
ではやっていきましょう。
開発環境は、Xcode4.3.3、エミュレータはiPhone iOS5.1です。
プロジェクトの作成
プロジェクトは上で説明したように「Single View Application」か「Empty Application」の中から選びます。今回は「Single View Application」を選択しました。俺はViewも何もない状態から作ってやるぜって方は「Empty Application」で。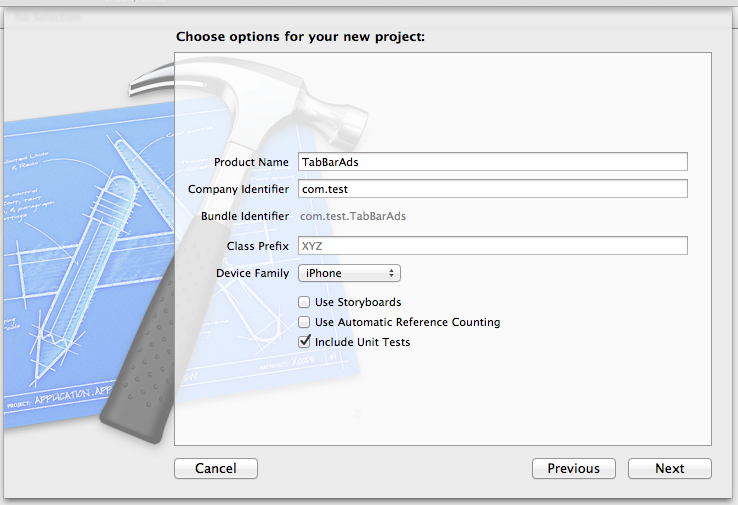
プロジェクト名は「TabBarAds」、StoryBoard、ARCなしで作成。
アプリの動き
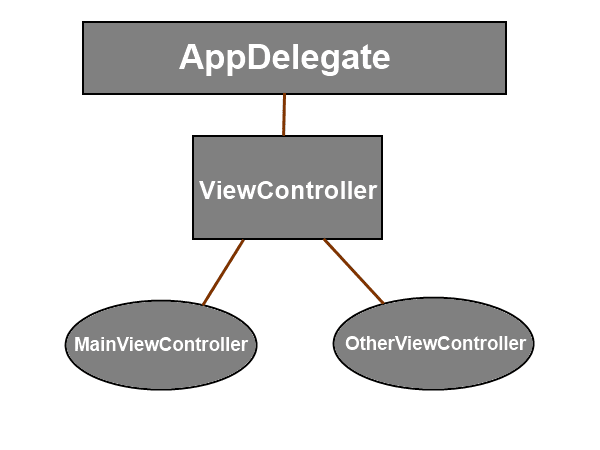
作成されたプロジェクト(「Single View Application」)では、AppDelegateからUIViewControllerを継承した「ViewController」が呼ばれる形になっています。この「ViewController」をタブを管理するクラスにし、新たに作成する他のビュークラスを操作するようにします。
ビューの追加
それではビューを追加していきます。今回は2つのタブを持ったアプリを作っていくので2つビューを追加します。MainViewController
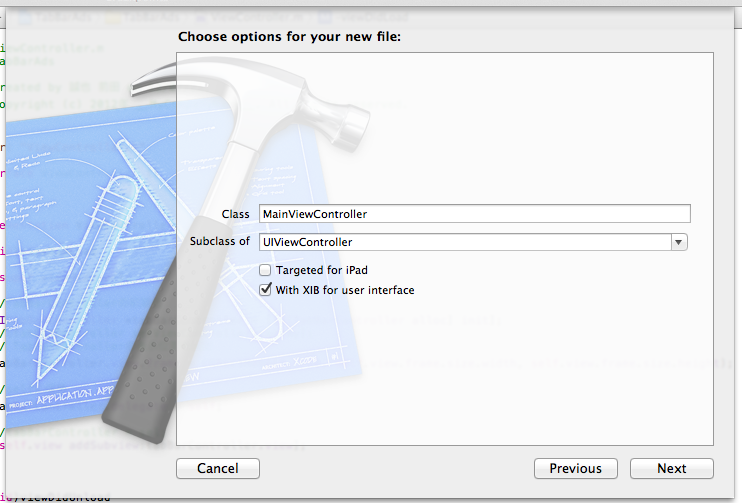
OtherViewController
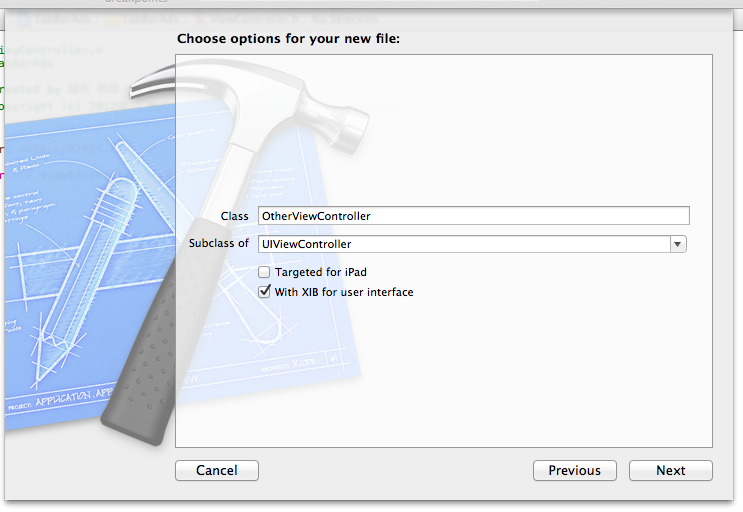
作成の際にXIBファイルの生成チェックも忘れずに。
とりあえずタブバーを表示してみる
ViewControllerを弄ってとりあえずタブバーを表示してみます。ViewController.mを修正
viewDidLoad:メソッドでタブバーを呼びます。UITabBarControllerの使い方はこちらが参考になります。
ViewController.m
- (void)viewDidLoad
{
    [super viewDidLoad];

    /*追加はじめ*/
    //TabBarControllerの初期化
    UITabBarController *tabBarController = [[UITabBarController alloc] init];
    // TabBarControllerの表示位置の設定
    tabBarController.view.frame = CGRectMake(0, -50, self.window.frame.size.width, self.window.frame.size.height);
    //表示
    [self.window addSubview:tabBarController.view];
    /*追加おわり*/
}
これを実行すると以下のようになります。
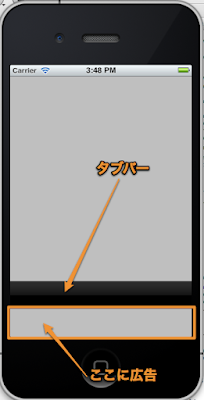
CGRectMakeメソッドで初期化の際にy座標プロパティに-50を指定し、広告を入れる領域を確保しています。
アイテムを追加する
タブバーの表示ができたので、次は表示するアイテムを追加します。ViewController.hの修正
タブを管理する「ViewController」を修正します。とりあえずインスタンス作ります。デリゲート UITabBarControllerDelegate, UITabBarDelegateを指定します。ViewController.h
#import <UIKit/UIKit.h>
#import "MainViewController.h"
#import "OtherViewController.h"

@interface ViewController : UIViewController<UITabBarDelegate, UITabBarControllerDelegate, UITabBarDelegate>

@property (nonatomic,retain) MainViewController *mainViewController;
@property(nonatomic,retain) OtherViewController *otherViewController;
ViewController.mの修正
「ViewController.m」2回目の修正もviewDidLoadメソッドだけです。ViewController.m
- (void)viewDidLoad
{
    [super viewDidLoad];

    //mainViewController初期化
    mainViewController = [[MainViewController alloc] init];
    //タブバーアイテム初期化
    mainViewController.tabBarItem = [[UITabBarItem alloc] initWithTitle:@"メイン" image:[UIImage imageNamed:@"135-hockeymask.png"] tag:0];
    //NavigationControlleにmainViewControllerを紐付ける
    UINavigationController *naviControllerMain = [[UINavigationController alloc]initWithRootViewController:mainViewController];

    //otherViewController初期化
    otherViewController = [[OtherViewController alloc] init];
    //タブバーアイテム初期化
    otherViewController.tabBarItem = [[UITabBarItem alloc] initWithTitle:@"あざー" image:[UIImage imageNamed:@"82-dog-paw.png"] tag:0];
    //NavigationControlleにotherViewControllerを紐付ける
    UINavigationController *naviControllerOther = [[UINavigationController alloc] initWithRootViewController:otherViewController];

    //表示ビューを配列に設定
    NSArray *viewAarray = [NSArray arrayWithObjects:naviControllerMain, naviControllerOther, nil];

    //TabBarControllerの初期化
    UITabBarController *tabBarController = [[UITabBarController alloc] init];
    //TabBarControllerに表示ビューをセット
    [tabBarController setViewControllers:viewAarray];
    // TabBarControllerの表示位置を設定
    tabBarController.view.frame = CGRectMake(0, -50, self.view.frame.size.width, self.view.frame.size.height);

    //デリゲート通す
    self.tabBarController.delegate = self;
    //タブバーの表示
    [self.view addSubview:tabBarController.view];
}
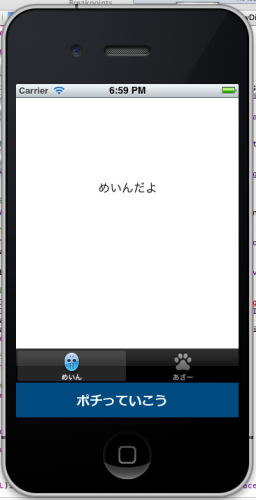
5~10行目がMainViewController、12~20行目がOtherViewControllerの初期化及び設定。それを20行目NSArray型配列に格納し、25行目でツールバーにセットしています。
ちなみにタブバーアイテムの画像は以下のフリー素材を使用しました。
Glyphish – Great icons for great iPhone & iPad apps
フリーですがクオリティの高い素材ですよ。
実行すると以下のようになります。
 |  |
肉球かわいい。
広告表示領域の設定
広告の表示ですが、広告サービスに登録していないのでとりあえず画像を挿入してみました。viewDidLoadに以下を記述します。ViewController.m
UIImage *image = [UIImage imageNamed:@"ads_image.png"];
UIImageView *imageView = [[UIImageView alloc] initWithImage:image];
imageView.frame = CGRectMake(0, 410, image.size.width,image.size.height);
[self.view addSubview:imageView];
実際に広告を入れる際はInterface BuilderでUIViewを作ってOutlet通してそこに広告を埋め込む感じがよさそうです。
おわり
コンテンツを増やしたくなったらそれに応じてクラスを作って「ViewController」で設定してあげてください。あとは自分好みに色々と機能を付けていってください。間違いなどあればコメントから指摘していただけると幸いです。
0 件のコメント:
コメントを投稿